Showing posts with label Gluten-free. Show all posts

Saturday, 8 February 2014

Eggplant parmigiana

Today I made a yummy eggplant parmigiana (or baked eggplants with parmesan) following my nonna's recipe. I just slightly modified it to use some leftovers of roasted chicken. Serve with green salad or pasta if you really wants some carbs - that was a no-no for me trying to manage my weight after a decadent holiday trip.


Follow the instructions and travel to Italy!


And because, we never waste anything in my kitchen - it's not that dinosaurs eat really anything though - tonight I made bruschetta with the leftovers of the eggplant parmigiana. Take a slice of bread (which was a leftover of a cereal loaf I made two days ago), spread the eggplants parmigiana previously chopped, add tasty cheese on the top, 8 mins under the grill and there you go!


Ingredients (4-6 serves)

- 3 eggplants, large, sliced in the length, between 0.5 and 1cm
- 3 cans of peeled tomatoes, finely diced, or lots of fresh ripe tomatoes
- 60 g parmesan, freshly grated
- 2 garlic cloves, finely chopped
- 5 tsp of olive oil
- 10 basil leaves
- 1 tsp of sugar
- 1 tsp tomato paste
- salt and black pepper
- leftovers of roasted chicken, finely chopped (optional)


Instructions (~ 45 mins) 

Pre-heat the oven, fan grill at 180C.
1. Heat 1 tsp of olive oil and stir the garlic in.
2. Quickly add the tomatoes and pour 1 can of water in. 
3. Stir in the tomato paste and the sugar. Season and add the basil.
4. Leave it on medium heat until it had reduced by half.

5. Brush the eggplants with the remaining oil on each side and precook them either in a frying pan or in the oven at 180C.*
6. Stack one layer of eggplant, then tomato sauce, parmesan and chicken (optional) after the other. Finish with parmesan.
7. Put in the oven for 20-25 mins. If the top starts burning, add foil on the top (which I obviously forgot to do today, hence a black-ish top on my eggplants - fail!)

Enjoy with pasta or green salad!

Good to know...

* I prefer the oven for its time-efficiency and it's less mess in the kitchen. But I prefer in the frying pan for the taste. Just choose the option that suits you the best, at the end they will be good anyway.

Saturday, 14 December 2013

Pistachio and berries friands (GF) - Financiers a la pistache et aux fruits rouges (GF)

I love making (and eating) friands! There are quick to make and very convenient to use unused white eggs after you made a custard or ice cream. Plus, it's very fancy: tiny, yummy, pretty and French! So easy to wow your guests with friands! At last but not least, there are super easy to turn into a gluten-free sweet treat!

Here is my latest favourite recipe: pistachio friands with berries. This is a GLUTEN-FREE recipe!


Monday, 7 October 2013

Grapefruit and coconut chicken salad

Another great spring day - Summer is just around the corner! Here we are like busy bees in the garden: we started the herb patch, strawberry flowers are turning into small fruits, the raspberry plants are reviving and the earth of the veggie patch ready to get new seedlings. We already sow cucumber, zucchini, sweet basil, and lettuce in trays. Every day No.1 water his tray of veggies. I really enjoy watching him so excited about the sowing/growing vegetable process.
And you know what? while we were digging the ground, my little paleontologist even found a dinosaur bone. Yes a real one! He said that it would probably be a T-Rex arm. I did not make a picture so I was overwhelmed by the little stars in his eyes... love...

The garden kept us so busy all week end that I had very little time left for the kitchen. After a busy week end in the garden, nothing much was available in the pantry or the fridge. Leftovers of roast chicken, some grapefruits kindly given by a colleague - thanks! - and a need for raw veggies, all in a fresh mix that would suit an 11 month-old. Half an hour later we were all enjoying a fresh grapefruit and coconut chicken salad!


Saturday, 5 October 2013

Lentil and ham hock spring salad

What a wonderful spring week we had! This has tickled my taste for salads. But my pantry is still full of winter-ish food like lentils and ham hocks. And veggies like capsicum and tomatoes are not exactly of season yet, so still a bit expensive.


Not a problem, lentils and ham hock gives you a nice end of Winter - early spring salad dinner, and you just need a little bit of capsicum and tomato.
In my native region in France, Alsace, we often eat cured meat like ham hocks (although we don't use this cut of the pork, but rather fillets, belly and shoulder). I love them, they are so flavoursome and require very little preparation as they just need to be boiled up. With a dash of mustard or horseradish, this kind of meat, warn or cold, is delightful! Here in NZ, ham hocks are what you can find at the butchery, although it is very tasty, it has not as much meat as on another cut like fillet or shoulder. And you better don't eat all the ham hock skin and fat, otherwise it is not as healthy - it's just a matter of being reasonable!


And the best? If you have lentil leftovers or cans, then it will take you less than 30 mins to make this nice meal for your family. Enjoy your spare time in spring!

Ingredients (6 servings)

- 2 ham hocks
- 600 g brown lentils, cooked, cold (dry or can)
- 1 large red capsicum
- 2 tomatoes
- 1 shallot
- 1 or 2 tbsp grainy mustard (to taste)
- 1/2 tsp Dijon mustard
- 2 tsp olive oil
- 3 tsp red wine vinegar
- 1 tbsp water
- greens
- salt, white pepper

Preparation (30 mins)

1. Wash the ham hocks under cold water. Then put them in a large pot, cover with water and bring to the boil for 10 mins in order to wash all the impurities.
2. Dice the tomatoes, chop the onion and the capsicum. Mix with the lentils.
3. To make the dressing, mix together the mustard and the oil. Then add the vinegar. If the dressing is a bit too vinegary to your taste, then add a dash of water, but not more oil. Season with salt and pepper. Mix in the salad. You can either this salad on the top of some green leaves or mix them in.
4. Carve thin slices of ham hock to serve with the salad. Or if you prefer dice the ham hocks and mix in the salad.

Bon appetit!


Saturday, 28 September 2013

Buttercup, kumara and spinach curry with chicken breast

I think I've already told you about our soup day at work. Few weeks ago, one of my (male) colleague's partner made a fantastic pumpkin and spinach curry. So rich in flavours, very hot, so well balanced. Probably, the best curry I ever had. When I asked for the recipe, I got a: 'emh... emh emh...' She actually had no recipe, she was just cooking from heart, and honnestly we could feel it. That vegan curry was awsome!


I don't pretend to even compare with this curry but this awsome pumpkin and spinach hot curry inspired today's recipe: a butternut, kumara and spinach curry, which I served with chicken breast rubbed in the same curry spices for those meat-lover dinosaurs.


This curry is not as spicy as the one that inspired it because I need to look after my little dinoboys' buds. But the combination of spices works very well. And you may not believe me, but this is a very healthy dish!


Ingredients (~ 6 servings)

- 1 buttercup, medium size, cubed (2 cm pieces)
- 6 kumara, cubed (2 cm pieces)
- 4 garlic cloves, unpeeled (en chemise)
- 4 bunches of spinach
- 1 onion
- 4 tbsp plain yoghurt
- 2 tsp olive oil*
- a pinch of dry hot chilli (optional)
- 1/2 tsp black pepper, whole
- 1 tsp cumin seed
- 1 tsp mustard powder
- 1 tsp coriander seeds
- 1 tsp turmeric
- 1 1/2 tsp ginger ground
- 250 ml water
- salt
- 1 chicken breast (800 g), skin less, cut in two


Sunday, 22 September 2013

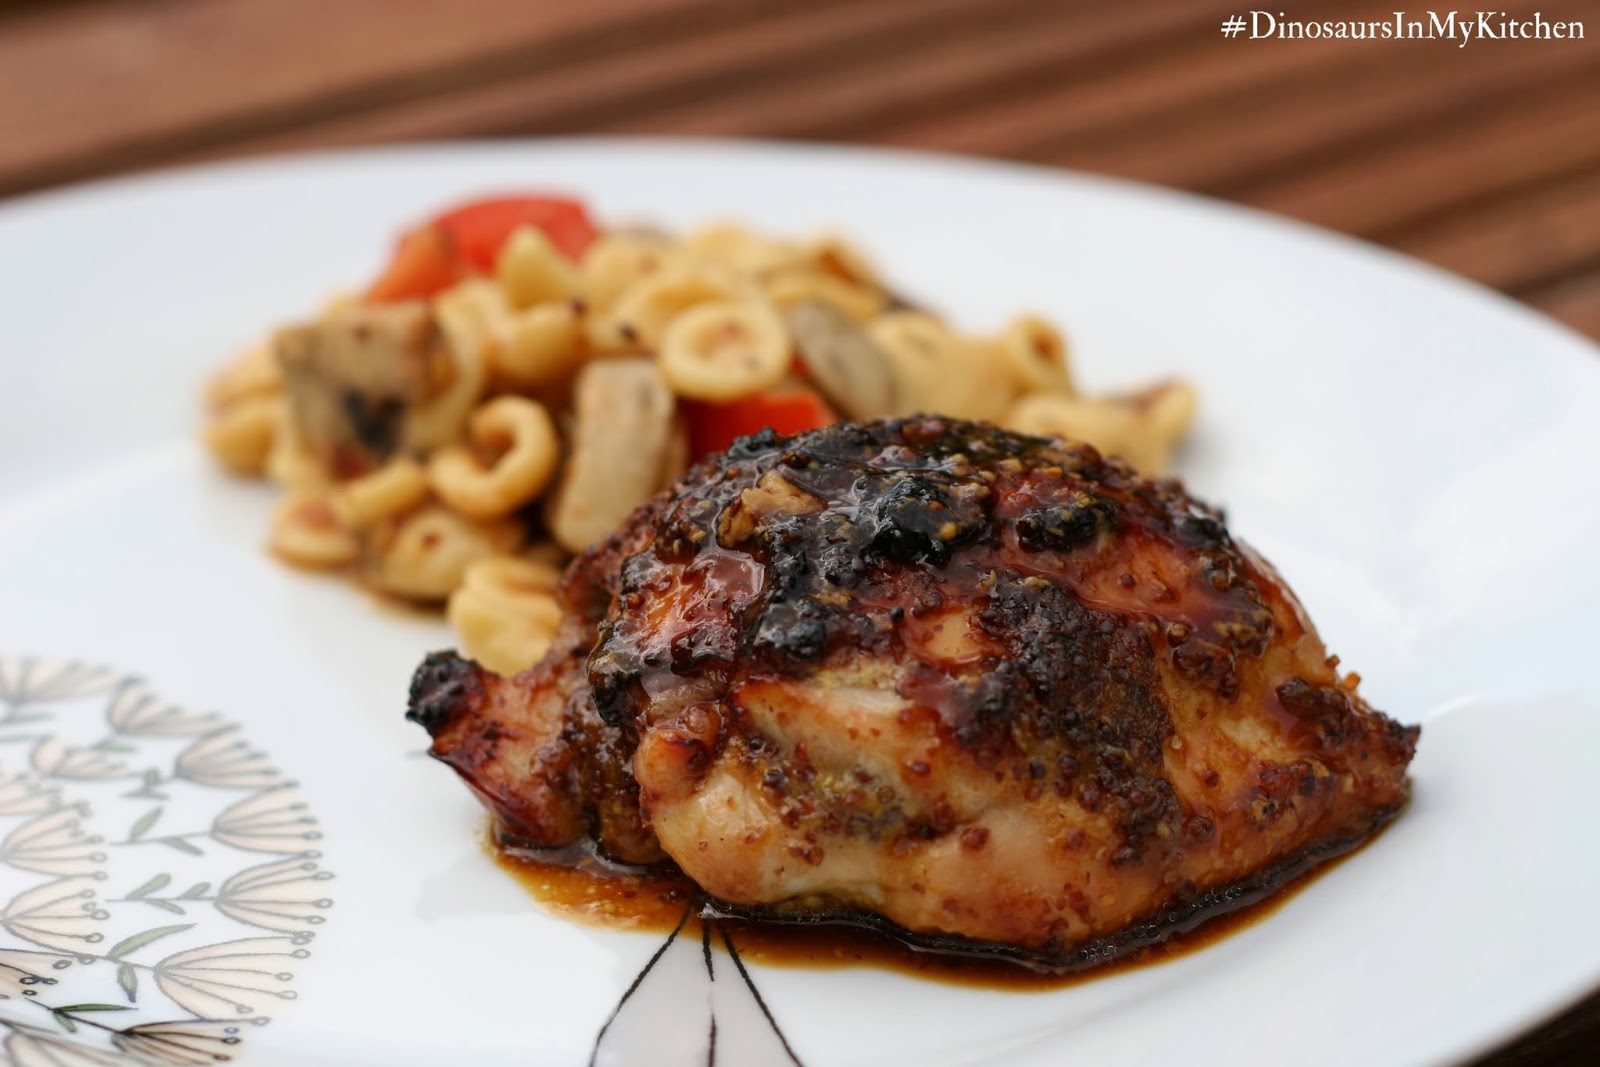
Honey and grainy mustard-glazed chicken thighs with orrechiette salad

Sometimes, the best recipes are the improvised recipes. I recently received Rata honey for experimenting with it and grainy mustard from a friend. I thus improvised honey and grainy mustard-glazed chicken.


To serve with I used leftovers of home-made pasta dought, which I shaped into orrechiette to create a beautiful but simple roasted tomatoes and mushroom orrechiette salad. The salad is better served warm.


Spot on! all the flavours, from the chicken and the salad went very well together.


Home-made orrechiette are quite time-consuming - so we worked as a team: Dinodad rolled the little balls, Dinomum squeezed and rolled the balls on the board to form the orrechiette and Dino No.1 checked that the orrechiette were well shaped, while No. 2 was nicely sleeping! Heaven! These moments are so rare that I have to record them. But this is not the topic of this post!
Be reassured, you don't need to make your own orrechiette, dry orrechiette will be perfect instead!


Ingredients (6 servings)

- 6 chicken thighs, skinless, deboned
- 1 1/2 tbsp honey*
- 3 tbsp grainy mustard
- 1 tbsp olive oil
- salt, black pepper
- 4 tomatoes, chopped in 16
- 10 mushrooms, chopped in 4 or 6 depending their size
- mixed herbs
- 400 g orrechiette*

Instructions (~ 45 mins)

1. Pre-heat the oven, fan bake, at 180C.
2. Mix the grainy mustard, the honey and the olive oil together.
3. Brush the mustard mix all over the chicken tights and roll it on itself. Salt.
4. Put the meat in a baking dish and in the oven for 30 mins at 180C.*
5. Cook the orrechiette and prepare the veggies.
6. Five minutes before the chicken is ready, add half of the tomatoes and the mushrooms in the baking dish and cook with the chicken for 5 minutes. Keep the other half of tomatoes raw for the salad.
7. Take the veggies out and mix in the orrechiette (cooked and drained). Drizzle the cooking jus from the baking dish over the orrechiette as a seasoning. Add one extra tsp of mustard if you want to give it a kick.
8. Add the raw tomatoes and sprinkle some mixed herbs. Season with salt and pepper to your taste.
9. Serve and bon appétit!

Good to know...

* I used a Rata honey (Airborne); because it is a little buttery, I heated it slightly for better combination with the mustard and the oil.
* You're welcome to increase the portion of pasta, but after several months of WW diet (and 14 kg less! Yay!!!), I learnt to increase the proportions of veggies at the expense of the carbs. So if you want to keep this meal as healthy and balanced as possible, I suggest you stick with 60-70 g pasta per person.
* The honey, mustard and oil mix will slightly caramelised over the chicken. The pictures may look like burnt but it was just perfectly caramelised. That said, be careful that you oven temperature is not too high or the glazing may burn.
* For my GF friends, I suggest to replace the orrechiette by cannellini beans - you'll love this salad!

Wednesday, 18 September 2013

Mediterranean beef casserole

I love slow-cooking recipes! They are hearty, but can be made healthy, for quite cheap and require little skills. On the downside, it takes time to nurture such a dish. When I'm cooking for my family, it's always worth the time! And they give it back to me.
This Mediterranean beef casserole is perfect to warm up grey-ish days like today: a tiny tomato-ish, with spring seasoning based on thyme, balsamic vinegar, olives, capers and parsley, and a touch of red wine.


Served on mashed potatoes or pasta, all the family loves this hearty meal! Grown ups: Don't forget to compliment it with a glass of red wine ;)

Ingredients (~ 6 servings)

- 1 kg beef chuck strips (1 x 3 cm)
- 1 yellow capsicum
- 2 cups beef stock
- 1 cup red wine
- 1 onion, sliced
- 3 garlic cloves, crushed
- 1 tbsp olive oil
- 2 tbsp balsamic vinegar
- 2 tbsp tomato paste
- 2 tbsp capers
- 1/2 olives (green or black)
- 1 tbsp rosemary, chopped
- 2 tbsp fresh parsley, chopped
- salt, pepper


Saturday, 14 September 2013

My NZ version of Paella: A seafood and meat one-pot dish

Seafood or meat? carbs or veggies? Why not all together in a gorgeous one-pot dish?
Today I'm sharing a rich nevertheless healthy Spanish-inspired one-pot casserole: A Paella.


Originally from the province of Valencia in Spain, there is not one version of the Paella, but many local or family versions. Here is my NZ quick - well relatively quick - and easy recipe!
Paella is a mix of white rice, green vegetables, meat (including rabbit, chicken and other) and/or seafood, beans, saffron-based seasoning and olive oil. This dish is originally cooked in a pan (not a pot as above) but you need a very large pan, so my version uses a pot (iron-cast). This cooking ustensil inspired the name of the Paella after the old French word for pan: paelle.

You'd be surprised how well this dish matches NZ food. It is actually a great dish to showcase the delicious - although a bit too big for my taste - green mussels from Coromandel and NZ shellfish like cockles freshly picked from Cockle Bay, Whangaparaoa - a great kid activity by the way! we love it!


Don't worry about the quantity of ingredients, it is still very easy to make. You can also adapt the recipe to your fridge and pantry, but my favourite version this mixed seafood and chichen Paella. Although today I had no prawns which also go very well in this dish.


Ingredients (6 servings)

- 750g cockles
- 24 green mussels
- 6 chicken drumsticks
- 1 whole squid, sliced*
- 1 whole hot chorizo, sliced*
- 2 tomatoes, peeled* and diced
- 250g green beans*
- 1 cup frozen peas
- 1 large red (or green) capsicum
- 1 onion, chopped
- 10g butter
- 1 sprig of parsley
- 1 shallot
- 1/2 cup white wine (Pinot gris)
- 1 cup of water
- 1 1/2 cup of parboiled rice
- 1 1/2 cup chicken stock*
- 1 1/2 cup seafood stock (included in this recipe)
- 1 dose of saffron*
- salt, pepper

Cooking instructions 

(~ 1.5 hour)

The preparation

First prepare all your ingredients: slice the chorizo, the squid and the capsicum; chop the onion and the shallot; peel and dice the tomatoes; cut the green beans' tails.

Thursday, 12 September 2013

Lemon confits / Preserved lemons

Thanks to my FB follower who spotted a inconsistency between my FB page and the blog! I had accidentally removed this post from the blog... I probably got distracted by something... or someone... wonder who this might be... Anyway lemon confits are back!

The winter has ended; it is a good time to finish harvesting the lemons (or to buy them at a fair price), but you don't know what to do with all these lemons!? Let's prepare some jars of lemon confits or preserved lemons for summer salads and tajines. This is a very simple preparation that will add the little plus to your, sweet and savoury dishes, cakes and cookies...


Ingredients

- 1 kg lemons (~ 8 lemons), preferably organic if not coming straight from your garden
- 200 g salt
- hot water
- 1 big jar


Instructions

1. Incise the lemons in four quarters - do not cut them, the quaters must keep together (see picture above).
2. Stuff with one tablespoon of salt.
3. Squeeze all the salted lemons in a steril jar.*
4. Add the remaining salt in the jar and cover with hot water.
5. Close the jar tightly and store for at least 3 weeks before use.


Tips

* To sterilise the jar, first clean it, then keep it in boiling water for 10-15 minutes.

Monday, 26 August 2013

Lamb confit in olive oil and lime jus - Delightful!

The dinosaurs have been quite discrete in my kitchen lately. Don't you worry! They are still around. We even have got a baby dinosaur. It's a T-Rex, but he doesn't bite. He is scared by humans because he is a baby. Dixit my 4 years-old.

Few days ago, while I had to work from home while looking after my sick baby, my big boy commissioned me to take care of his baby dinosaur, who was also sick. It's was really cute to see my big boy talking and comforting to 'his baby dinosaur' as a parent would do. 'Don't worry my baby. Ma maman will look after you while I'm away at daycare. Don't cry. I'll come back later.'
And to me: 'Maman, please put him under the blanket and don't leave him alone. He is little and unwell. Don't be scared. He won't bite.'

What a relief! As long as he won't bite, I'll take care of him... That day promised to be quite busy, perfect for a 7-hours lamb leg confit!


I've already told you about the recipe I'm sharing today. You, busy working mums, busy mums at home, busy daddies, you greedy meat-lovers, working girls, business man, well you who is looking for a stunning dinner to full-fill your family or your hungry man, to impress your friends... with a minimum effort for a maximum effect, there you go: the 7-hours lamb leg confit or lamb leg a la cuillere.


I hear you thinking: "7-hours?! She's completely out of her mind!!!... I'm too busy, can't afford the time..." COME BACK! - I said: come back! Pleeeaaase! You won't regret it.
The roast will cook for seven hours, but it will take at most 15 minutes off your time. Trust me! You can either go out for shopping or work (using the stop cooking function of your oven), spend your day playing/looking after the kids, gardening, doing cross-words or maybe doing some Lebanese bread to compliment your lamb leg confit... while the lamb leg is slowly cooking for you...
Just try it, you'll love it!


With this lamb confit recipe, you'll get a moist and tender meat falling off the bone with a beautiful olive oil and lime jus to baste the meat and the veggies. The meat will be so moist and tender that you can spoon it! Hence the French name 'a la cuillere'. De-Light-Ful!


Sunday, 18 August 2013

Home-made praline / praliné

I'm preparing some special hazelnut sablé biscuits for my son's daycare snacks. Those French biscuits needs some flavoursome praliné paste, which probably can't be bought from NZ supermarkets or groceries. The good news is that it is super easy to make your own praline and once you have tasted this delicious topping or paste, I bet you'll become addict straight away!


The recipe I'm sharing today comes from a world-renowned French pastry chef: Philippe Conticini, so it is a high standard recipe, but you'll be stroke how easy it is. You just need a good food processor and a little bit of patience.

But what's praline or praliné? It's a combination of hazelnuts and/or almonds, but could also contain pistachio or cashew. The nuts are roasted, then cooked in a slightly dark toffee and pulverised finely. After few seconds in the mill or blender, you'll obtain a powder - the praline -, if you keep grounding, then you'll obtain a paste - the praliné -.


The praline is a gourmet topping for ice-cream or custard, crumble and apple pies, and I bet it would be lovely on the top of a pavlova... I'm just saying...
The praliné paste is delicious spread on toasts, combined in crème chantilly for choux filling, or combined in cake, brioches, cookies and biscuits.


Tuesday, 13 August 2013

Vanilla ice-cream

Tuesday... only... And I wish we would already be Friday! Today was exhausting, taking the bus to the City with bubba in the sling... several meetings and finishing work near to 5 pm! Thanks man, you found something to re-heat for dinner tonight! It's just a shame men can't think forward, in particular of the next day and the lunch boxes of our little ones. So I ended up cooking something after dinner for my boys' lunches tomorrow. The good stuff is that everything is ready for tomorrow night! Yay!!!

Although my bed is insistently calling for me, I promised to share with you the recipes of my cooking week-end. Today, I continue with the dessert... remember my version of a mango crumble... - Yuuuummm, just thinking of it, I want a serve now! - requires vanilla ice-cream... yum yum! Unfortunately there is no more left, already! :/

Sorry I have no picture of the ice-cream on its own and I do not want to reveal my Mango crumble yet, be patient...

Ingredients (~15 scoops)

- 500 ml milk*
- 250 ml cream
- 130 g caster sugar
- 5 yolks
- 1 tbsp natural vanilla extract

Preparation

This ice-cream is based on a classic vanilla custard, which I recommend to make the day before to leave it the time to cool down and set before putting in the ice-cream maker.

1. Pour the milk and the cream in a pot, add the vanilla and heat until it starts boiling. Get the pot straight out of the heat when you see the first bubbling.
2. In the meantime, whisk together the sugar and the yolks until they whiten and double in volume.
3. When the milk and cream mix is hot, gradually mix into the sugar and yolk preparation with a wooden spoon.*
4. Pour back into the pot and put on gentle heat, while stirring gently until the custard coats the spoon.
5. Let cool down in the fridge. The custard will slightly thicken in the fridge.
6. When your custard is cold, the coldest possible, pour it in the ice-cream maker and churn for about 25-30 mins.* No worries if it is still a bit runny, the ice-cream will set in the freezer. Serve after an hour or more, but I definitively recommend to serve it the same day!

Tips

* I used trimmed milk for a healthier option but it works with light or full-fat milk, too.
* The secret to a successful custard is to not whisk briskly otherwise you may split the cream. Do not use a whisk. If the cream splits, no worries, there is a trick to save your custard: when you're happy with the consistence (after step 4), then mix it in a blender and rest.
* The churning time depends on the temperature of your custard as well as of the iced bowl. So feel free to adapt this timing to your particular context.

Sunday, 4 August 2013

Beef and brown lentil casserole

Just another lovely winter Sunday! Grey sky to remind you the season but mild temperature to let you have a walk in the bush. I love those NZ winter days. It reminds me only the best aspects of European winters: the time slows down, the streets are more quiet, family members get together, parents play board games with children, grannies would bake with grand-daughters, grandpa would share old stories with grand-sons and families sit all together around a hearty meal that cooked nearly all day long! Winter can be very comforting.

I find NZ winter somehow more comforting: I feel less endangered by the sun rays, but we can still enjoy outdoors; sunrises and sunsets are just perfectly timed to be enjoyed, and I have the chance to live so close to the sea front... I love winter sunsets on the bay.. There is no buzz or rush in the malls, no stress about Christmas coming up soon (in spite of the magic of winter Christmas, it can be quite stressful). In absence of Christmas celebrations in NZ winter, there is at least one thing that does not change: kids are still super-excited (or in a dinosaur mode for some) and drive their parents crazy! If this is your case, just take them to the bush and leave let them have a walk for an hour or two and they'll sleep in the car on way back home.

Beyond super-excited kids, NZ winter gives you the time to enjoy your time at a slower pace under a mild climate. - Okay, okay... I'm a bit biased by the quite dry winter we have this year... or maybe by the new house, fully insulated and double glazed, that changed our life since few months! Anyway, when it's not pouring raining, I love NZ winter!
Besides rain, cold or sun, we still enjoy a slow-cooked one-pot dinner during NZ winter. No worries, I assure you this hearty beef and lentil casserole did not cook for all day long! There is a little trick to avoid that lentils take ages to be soft. Just follow the recipe ;-)


Saturday, 3 August 2013

Apple, plum and blueberry puree/compote

I know, plums are not in this season. But since the beginning of winter, I could see plums sold in the fruit stores. While I'm usually not keen on using fruits and veggies when not in the season, I thought that my 9 months-old may appreciate a little bit of novelty, after the repetitive (almost boring) apple/pear, apple/banana, apple/pineapple, apple/orange, apple/mandarin, apple/mango compotes and other mix of those fruits. I could have chosen kiwi fruits instead but I've been a bit reluctant at introducing kiwi fruits - probably another (mis)belief related to my background. You kiwi should probably think I'm wrong; especially because it would be cooked anyway!
I prefer to say I am extra-cautious. Anyway, I decided to buy those plums, which by the way were quite sweet and juicy. And I added the blueberries mostly to enhance the colour.
Guess what? Baby dino loves it!
The quantities recommended in the recipe gave me two jars like the one on the picture.


Ingredients (~ 10 servings)

- 1 kg Braeburn apples
- 5 red plums
- 3 tbsp blueberries (can or fresh)

Instructions

1. Peel and slice the apples.
2. Pit and chop the plums.
3. Cook all the fruits together for about 30 mins or until soft.
4. Blend together, let cool down and serve!

Thursday, 1 August 2013

Braised pork tenderloin with butternut squash and fried polenta

Sunday, I left baby and partner home and I took my 4 years-old to the movies. The movie was very good for little ones, a lovely story about friendship between a bear and a mouse: Ernest & Celestine. After only few minutes, I felt blessed - and a little bit stupid to feel a bit emotional while watching a kid movie with my son - probably the lack-of-rest effect.
I felt so blessed to live in New Zealand, to be allowed to raise my children in this amazing country, to raise them as bilinguals and to share my native language and culture with my growing kiwis. What does it have to do with the movie? The movie was in French! When I left France, I gave up the idea of going to see a French movie with my children. But that was due to my ignorance of New Zealand way of integrating cultures. Not only New Zealand offers an amazing lifestyle, it also accepts and encourage the diversity of cultures. I couldn't tell for other cultures, but as French living in Auckland, we are blessed with a very active community that allows parents like us to pass our culture on our children thanks to playgroups (I love the kiwi culture of playgroups/playcentre, it's just a shame I have limited access to it because I work full-time), the preschools, the bilingual sections in primary schools and the various socialising French events and other festivals. Beyond the language, of course, food is another way to pass on our culture, and not only to our children.
After the movie, I felt even more blessed when I came back home where a meal from an original recipe by my mum had perfumed the entire the house after 2 hours of slow cooking earlier the same day: a braised pork tenderloin with a rustic-tasting but elegant sauce made from onions, carrots, tomatoes and mushrooms. This dish was well-known of all the kids from the neighbourhood in my home-town; this for the holy good reason that it is deliciously rich of flavour, while balanced and not overly fat.


Sunday, 28 July 2013

Sunday lunch: Marinated pork fillet, orange and cranberry sauce with quinoa, amaranth and green beans

When I was a child, in France, Sunday was a special family day. All the shops were closed. Only bakeries, patisseries and restaurants would be open. Everybody gets well dressed, some goes to the church, then to the local pub to take the 'apero' (apéritif). I sometimes went with my grand father and would be given the permission to drink a lemonade with a tiny bit of bier, we call it a panaché. Then, it's lunch time, with the close family or the extended family.
In my family, it was a tradition to have Sunday lunch in the dinning room while we would have our meals in the kitchen the rest of the week. This lunch was not just a quick, improvised, lunch, but well planned. It could sometimes be a 3-course meals, but often offered a dessert. This Sunday meal looked amazing on our plates. As children, we were looking forward to this special family moment. But once the lunch finished, our tummies were so full that the elder ones could not resist a nap.
This has probably changed now, 25 years later... But I remember those Sundays. They are good memories. 


Now, we live in New Zealand, a lovely and amazing country but far from our extended family. For these reasons and others, we tend to spend lot of our time keeping ourself busy with varying activities every Sundays, thus leaving little room to develop such custom in our family.
But now we have two kids, both working full-time, after the older one's activity on Saturday morning, we must acknowledge that we quite like spending a nice and quiet family Sunday at home - especially since we moved into our new house. Such a family Sunday would not be the Sunday of my childhood without a classy family lunch made with heart by mum.
Last Sunday, I spend just a minimum of time in the kitchen to make this surprising dish: Marinated pork fillet, quinoa, amaranth and green beans, with an orange and cranberry sauce. The pork marries very well with sweet flavours, and the sauce is very easy to make. While you could serve this dish with a classic butternut puree or egg noodles for an Asian twist, I opted for a healthy side: quinoa, amaranth and green bean. Even dinosaurs loved it!

What about YOU? Where ever you are, how does a Sunday lunch look like in your family?


Ingredients (4 servings)


- 2 pork fillets (1 kg)
- 1/2 cup light soy sauce
- 1 cup orange juice, freshly squeezed
- 3 tsp raw sugar*
- 3-4 tbsp dry cranberries* (to your taste)
- 1 cup quinoa and amaranth mix
- 250g green beans
- a pinch of chilli powder
- 1 orange, finely sliced (for garnish)

Tuesday, 23 July 2013

Prawn, ginger and coconut vermicelli soup - Thai inspiration

I quite knew it wouldn't be easy to conciliate children, dinosaurs, work, a passion an obsession for cooking and eating, a healthy and balanced dietary, and a cooking blog. Well I never claimed I would post fabulous recipes everyday, anyway. But what I did not expect was that No.2 would start teething and having poor poor or quasi non-existent nights, the same week I would finally start my blog!
Consequence: As usually, when I am under stress or tired, I compensate with food - Catch 22!
Tonight, I thus chose a rich and comforting, but so easy, Thai-inspired prawn vermicelli soup, a tiny bit spicy (or more just as you like!)


Ingredients (6 servings)

- 36 raw prawns, peeled (tail on)* 
- 300g rice vermicelli (dry)
- 350g of mixed veggies including: strips of red capsicum, broccoli, thin strips of carrots, chopped spinach, chopped green beans*
- 10g chinese black mushroom (dry, also found as dried fungus)
- 165 ml coconut cream
- 1.5 L chicken stock* 
- 40g fresh ginger, crushed
- 1 or 2 tsp red curry paste (to your taste)

Sunday, 21 July 2013

Pork Chili Con Carne

My dinosaur loves this Mexican-style one-pot meal: A pork chilli con carne. So do I!
It is very rich, reasonable time-wise (for a slow-cooked meal) and so rich.
Instead of beef I used lean pork, but a more fatty piece like pork shoulder or leg would be yummy too. I used pork because it gets tender faster than chuck steak beef or blade steak. I also added corn for the crunch.


Ingredients (6 servings)

5 min preparation + 40 min cooking

- 600g lean pork, cut into 2 cm pieces
- 1 can whole peeled tomatoes, chopped*
- 2 cans kidney beans, drained but not washed
- 1 can corn, drained (whole kernel)
- 1 onion, sliced (French cut)
- 2 garlic gloves, crushed
- 1 tsp chilli powder (or according to your taste)
- 1 tsp olive oil
- 1/2 tsp sugar*
- salt, black pepper

Saturday, 20 July 2013

Stand up ovation! Caramel custard / Home-made Danette

There are many food products that we miss from France when we live here in New Zealand.
Remember, two days ago, I opened a can of evaporated milk for the first time of my life. And when I tasted it, it reminded me one of those missed French pudding: the famous Danette - and now all my French followers are singing 'On se lève tous pour Daaanette, Daaanette!...", from the famous TV ad where everybody stand up for this pudding, creating a stand up ovation for this humble custard.
After more than two years in NZ and one can of evaporated milk opened, I finally decided to give it a go and experiment my home-made Danette. I still wonder why I did not try earlier.
It is actually very easy, easier than I'd thought, and very quick to make. Today, I chose the caramel flavour and it was delightful! And it is gluten-free!!! I may go for another serve right now...


Ingredients (5 servings)

Caramel:

- 150g white sugar
- 1/2 tsp lemon juice
- 5 tbp evaporated milk

Monday, 15 July 2013

Galettes bretonnes - Savoury crêpes

In my office, we all enjoy good food. So when one colleague offered to organise a soup tasting, everybody joined into the challenge and it turned in that, every Tuesday, one of us will cook a soup for the 12 others people.
I missed the first round last week - cause Chicken Pox - I thus missed the butterchicken soup :(
Tomorrow, it's my turn. But because I just can't do like anybody else, I decided to prepare galettes and crêpes for everybody. Naaah! I actually offered to prepare galettes and crêpes to celebrate Bastille Day - the French national day. I'll take another turn in the soup tasting challenge.
As a French native, people always expect high standing dishes from me. Well, with galettes and crêpes, no doubt, it will be a hit!
Given time constraints, it was galette and crêpes dinner for the dinosaur family!