Showing posts with label French. Show all posts
Wednesday, 26 November 2014
Long time no see... Brioche parisienne/Sweet rolls
Long time no see... Although work has pretty much taken over everything this year, cooking and dinosaurs are still a big part of my life.
There is no better recipe than this recipe of Brioches Parisiennes (or kind of sweet rolls) to reconnect with my blog and my readers if there are any left! Give it a go and it will become you Sunday breakfast!
Originally those brioches do not contain chocolate chips but dinosaurs love them! If you opt for the roll version, pour some choc chips before rolling the dough. Raisin/sultana are a healthy alternative to chocolate.
Friday, 7 February 2014
Stuffed tomatoes - Tomates farcies
Hello there!!
After nearly 2 months of interruption due to a big Tiki Tour with my in-laws (yes we all survived this!), I am back, a veggie garden full of healthy goodies and - let's be fair - 6 kg to get rid of! So back on a healthy well-balanced diet, but without compromising flavours and mouth pleasure.
This is a French summer classic: Tomatoes stuffed with beef mince and herbs, usually accompanied by white rice, I chose quinoa and broccoli. There are many version of this recipe; I kept this one pretty simple - after 5 weeks on the roads of NZ, I need rest - so quick, easy and efficient!
After nearly 2 months of interruption due to a big Tiki Tour with my in-laws (yes we all survived this!), I am back, a veggie garden full of healthy goodies and - let's be fair - 6 kg to get rid of! So back on a healthy well-balanced diet, but without compromising flavours and mouth pleasure.
This is a French summer classic: Tomatoes stuffed with beef mince and herbs, usually accompanied by white rice, I chose quinoa and broccoli. There are many version of this recipe; I kept this one pretty simple - after 5 weeks on the roads of NZ, I need rest - so quick, easy and efficient!
Libellés :
Beef
,
French
,
Healthy food
,
Savoury
,
Summer
Saturday, 14 December 2013
Pistachio and berries friands (GF) - Financiers a la pistache et aux fruits rouges (GF)
I love making (and eating) friands! There are quick to make and very convenient to use unused white eggs after you made a custard or ice cream. Plus, it's very fancy: tiny, yummy, pretty and French! So easy to wow your guests with friands! At last but not least, there are super easy to turn into a gluten-free sweet treat!
Here is my latest favourite recipe: pistachio friands with berries. This is a GLUTEN-FREE recipe!
Libellés :
Baking
,
Cake
,
French
,
Friands
,
Gluten-free
,
Patisserie
,
Sweet
,
White eggs
Wednesday, 11 December 2013
Gingerbread biscuits - An Alsatian tradition for Saint Nicolas
All right, I am late about that post...
Every year on the 6th of December, since I am a child, I enjoy this family tradition. Saint Nicolas, protectors of children, visit houses and reward well behaved girls and boys. It is cold and dark (in France). We - the children - are all excited about his coming but also a bit anxious that we may receive the visit of the Pere Fouettard - a nasty, scary, smelly guy who correct naughty children and may eventually take them in his bag. So this night, we would stay with our family sharing treats in a very special atmosphere: hot chocolate, ginger bread (i.e., pain d'epices in French), mandarin, walnuts and other treats. The little man, called Mannele in Alsatian, are made of brioche (a sort of a sweet bread) - these are also part of the tradition; I will write another post with this recipe - in the meantime, you could use my recipe for soft milk buns - here.
This is the recipe of a tasty-licious ginger bread that is originally coated in chocolate or cover with royal icing, on the top of what we put a picture of the majestic Saint Nicolas (see the picture). In order to involve No. 1, this year, we also used a ginger man cookie cutter. We made them for his daycare Christmas family party and especially for Santa.
At least, you can't say that you have not got time to practice this easy recipe for next year Saint Nicolas.
Every year on the 6th of December, since I am a child, I enjoy this family tradition. Saint Nicolas, protectors of children, visit houses and reward well behaved girls and boys. It is cold and dark (in France). We - the children - are all excited about his coming but also a bit anxious that we may receive the visit of the Pere Fouettard - a nasty, scary, smelly guy who correct naughty children and may eventually take them in his bag. So this night, we would stay with our family sharing treats in a very special atmosphere: hot chocolate, ginger bread (i.e., pain d'epices in French), mandarin, walnuts and other treats. The little man, called Mannele in Alsatian, are made of brioche (a sort of a sweet bread) - these are also part of the tradition; I will write another post with this recipe - in the meantime, you could use my recipe for soft milk buns - here.
This is the recipe of a tasty-licious ginger bread that is originally coated in chocolate or cover with royal icing, on the top of what we put a picture of the majestic Saint Nicolas (see the picture). In order to involve No. 1, this year, we also used a ginger man cookie cutter. We made them for his daycare Christmas family party and especially for Santa.
At least, you can't say that you have not got time to practice this easy recipe for next year Saint Nicolas.
Thursday, 14 November 2013
Easier and tastier than a sponge cake - The 'Wow' factor of the Gateau Lorrain
After a computer break down, lots of baking and parties, super busy work weeks and a teething crisis (4 teeth in 4 days nights, I am finally back... as a survivor... Poor baby though, that was terrible for him. No.2 is back to normal with a new and so unexpected routine of 4 hours sleep a day (twice 2-hours sleep). Who knows how long it will last? There is definitively a God! thanks to Him!
Given the usual workload and the obvious absence of any backup or granny (as an expat family), I chose a fairly easy cake that I filled with vanilla custard, decorated with whipped cream, tangelo jelly and and fresh fruits. I declined three version of this cake: one for the daycare party, one for our private family party and one for our friends party. Easy, beautiful but still pretty healthy - success guaranteed!
The base for the cake is from an original French recipe: the gateau Lorrain. Few years ago, this cake has been showcased on a French blog Les Ateliers d'Hys. It's been a hit and almost all cooking blogs showcased their own declination of the gateau Lorrain. I literally fell in love with this cake - it is moist, fluffy so delicate. I love it straight, with cream, custard, fruits, whatever I love it!
Given the usual workload and the obvious absence of any backup or granny (as an expat family), I chose a fairly easy cake that I filled with vanilla custard, decorated with whipped cream, tangelo jelly and and fresh fruits. I declined three version of this cake: one for the daycare party, one for our private family party and one for our friends party. Easy, beautiful but still pretty healthy - success guaranteed!
The base for the cake is from an original French recipe: the gateau Lorrain. Few years ago, this cake has been showcased on a French blog Les Ateliers d'Hys. It's been a hit and almost all cooking blogs showcased their own declination of the gateau Lorrain. I literally fell in love with this cake - it is moist, fluffy so delicate. I love it straight, with cream, custard, fruits, whatever I love it!
Libellés :
Birthday
,
Cake
,
French
,
Mum life
,
Patisserie
,
Pudding
,
Sweet
,
White eggs
Saturday, 5 October 2013
Lentil and ham hock spring salad
What a wonderful spring week we had! This has tickled my taste for salads. But my pantry is still full of winter-ish food like lentils and ham hocks. And veggies like capsicum and tomatoes are not exactly of season yet, so still a bit expensive.
Not a problem, lentils and ham hock gives you a nice end of Winter - early spring salad dinner, and you just need a little bit of capsicum and tomato.
In my native region in France, Alsace, we often eat cured meat like ham hocks (although we don't use this cut of the pork, but rather fillets, belly and shoulder). I love them, they are so flavoursome and require very little preparation as they just need to be boiled up. With a dash of mustard or horseradish, this kind of meat, warn or cold, is delightful! Here in NZ, ham hocks are what you can find at the butchery, although it is very tasty, it has not as much meat as on another cut like fillet or shoulder. And you better don't eat all the ham hock skin and fat, otherwise it is not as healthy - it's just a matter of being reasonable!
And the best? If you have lentil leftovers or cans, then it will take you less than 30 mins to make this nice meal for your family. Enjoy your spare time in spring!
- 600 g brown lentils, cooked, cold (dry or can)
- 1 large red capsicum
- 2 tomatoes
- 1 shallot
- 1 or 2 tbsp grainy mustard (to taste)
- 1/2 tsp Dijon mustard
- 2 tsp olive oil
- 3 tsp red wine vinegar
- 1 tbsp water
- greens
- salt, white pepper
2. Dice the tomatoes, chop the onion and the capsicum. Mix with the lentils.
3. To make the dressing, mix together the mustard and the oil. Then add the vinegar. If the dressing is a bit too vinegary to your taste, then add a dash of water, but not more oil. Season with salt and pepper. Mix in the salad. You can either this salad on the top of some green leaves or mix them in.
4. Carve thin slices of ham hock to serve with the salad. Or if you prefer dice the ham hocks and mix in the salad.
Bon appetit!
Not a problem, lentils and ham hock gives you a nice end of Winter - early spring salad dinner, and you just need a little bit of capsicum and tomato.
In my native region in France, Alsace, we often eat cured meat like ham hocks (although we don't use this cut of the pork, but rather fillets, belly and shoulder). I love them, they are so flavoursome and require very little preparation as they just need to be boiled up. With a dash of mustard or horseradish, this kind of meat, warn or cold, is delightful! Here in NZ, ham hocks are what you can find at the butchery, although it is very tasty, it has not as much meat as on another cut like fillet or shoulder. And you better don't eat all the ham hock skin and fat, otherwise it is not as healthy - it's just a matter of being reasonable!
And the best? If you have lentil leftovers or cans, then it will take you less than 30 mins to make this nice meal for your family. Enjoy your spare time in spring!
Ingredients (6 servings)
- 2 ham hocks- 600 g brown lentils, cooked, cold (dry or can)
- 1 large red capsicum
- 2 tomatoes
- 1 shallot
- 1 or 2 tbsp grainy mustard (to taste)
- 1/2 tsp Dijon mustard
- 2 tsp olive oil
- 3 tsp red wine vinegar
- 1 tbsp water
- greens
- salt, white pepper
Preparation (30 mins)
1. Wash the ham hocks under cold water. Then put them in a large pot, cover with water and bring to the boil for 10 mins in order to wash all the impurities.2. Dice the tomatoes, chop the onion and the capsicum. Mix with the lentils.
3. To make the dressing, mix together the mustard and the oil. Then add the vinegar. If the dressing is a bit too vinegary to your taste, then add a dash of water, but not more oil. Season with salt and pepper. Mix in the salad. You can either this salad on the top of some green leaves or mix them in.
4. Carve thin slices of ham hock to serve with the salad. Or if you prefer dice the ham hocks and mix in the salad.
Bon appetit!
Libellés :
Express meals
,
French
,
Gluten-free
,
Healthy food
,
Lentils
,
Salad
Saturday, 28 September 2013
Soft sweet milk buns - Pains au lait
My 4 years-old is missing tonight... he's got invited for a sleep over at his friend's place. I should be having a party but instead I feel a little bit lonely. I am so not used to the silence in my home. But that's not the topic of this post.
This morning, first thing after he woke up, he got his backpack and started getting ready for this very first time event: he chose his favourite pj - no need to say his dinosaur pj -, some spare clothes for tomorrow and all the first necessity things. It was 8am and he was already ready to leave maman and papa for a new adventure. So to keep him busy before the separation - around 4 pm, we decided to make soft sweet milk buns with chocolate filling for a shared breakfast with his little mate.
These soft sweet milk buns - called pains au lait in French - are half way through in between bread and brioche. They are fluffy, soft and moist, and only slightly sweet. They are a quite a healthy treaty snack for little ones, including my 11 months old bubba. For the older ones, they can be filled with chocolate or jam. In general, they are perfect for breakfast or school snack. For breakfast, you can spread chocolate, jam or butter over it. You can even half them and toast them slightly. Yum!
As a child, I used to love those milky buns, with or without filling they are a hit with kids! As a grown-up I still love them and made several attempts before I finally found the best recipe, the one that reminds me of the bakery of my childhood in my hometown in the countryside of France. That's the recipe I'm sharing with you today. This recipe makes 12 buns - I made 8 chocolate-filled buns and 4 nature for my No.2.
No. 1 and I had lots of fun together making those buns, although as you can imagine that wasn't necessarily easy to manage the impatience of a 4 years-old: 'Wash your hands first.' 'No I said wash your hands first, yes with soap... AND water!!!' 'Now dry out your hands honey.' 'No! don't touch the eggs, not yet... be careful you may break them...' 'so now we need to measure the flour, when you see a 5 and two zeros here (I write on the white board to help him - he's only 4!), it means we have enough flour, alright?... that's good (25 g)... you're doing well (80g)... yep, yep, keep going... (90 g)... (115 g)... we need more honey... well I mean flour... (150 g)... (200 g)... ... ... (300 g)... (400 g)... a bit more... (650 g)... Ooopsie that was just too much (target was 500 g)...' Anyway, that's how it goes when baking with little ones. Just don't expect too much from your kids and you'll make it. As say a French blogger I like very much: "Our kids are all perfect! We (mums) are so imperfect... so what?" But with a dose of humour and lots of patience we can make it.
Really to be honnest I sounded more like: 'NOoooooo!! not YET! Wait, WAit, WA-IT!' 'That's good, yep, yep... nah, no, gentle... gen-tle... don't leek your fingers! GENTLE!!!... Don't touch... no don't touch... do not touch!... AAAAAAAaaaaaaaaaaaaaaah!!!!'
But we did it! I am very proud of my little baker. Don't they look gorgeous? - by the way my boy looked gorgeous, too, in his apron and with his chef's hat, but I don't feel ready to commit my kids' privacy, so sorry no pics.
Now the recipe...
This morning, first thing after he woke up, he got his backpack and started getting ready for this very first time event: he chose his favourite pj - no need to say his dinosaur pj -, some spare clothes for tomorrow and all the first necessity things. It was 8am and he was already ready to leave maman and papa for a new adventure. So to keep him busy before the separation - around 4 pm, we decided to make soft sweet milk buns with chocolate filling for a shared breakfast with his little mate.
These soft sweet milk buns - called pains au lait in French - are half way through in between bread and brioche. They are fluffy, soft and moist, and only slightly sweet. They are a quite a healthy treaty snack for little ones, including my 11 months old bubba. For the older ones, they can be filled with chocolate or jam. In general, they are perfect for breakfast or school snack. For breakfast, you can spread chocolate, jam or butter over it. You can even half them and toast them slightly. Yum!
As a child, I used to love those milky buns, with or without filling they are a hit with kids! As a grown-up I still love them and made several attempts before I finally found the best recipe, the one that reminds me of the bakery of my childhood in my hometown in the countryside of France. That's the recipe I'm sharing with you today. This recipe makes 12 buns - I made 8 chocolate-filled buns and 4 nature for my No.2.
No. 1 and I had lots of fun together making those buns, although as you can imagine that wasn't necessarily easy to manage the impatience of a 4 years-old: 'Wash your hands first.' 'No I said wash your hands first, yes with soap... AND water!!!' 'Now dry out your hands honey.' 'No! don't touch the eggs, not yet... be careful you may break them...' 'so now we need to measure the flour, when you see a 5 and two zeros here (I write on the white board to help him - he's only 4!), it means we have enough flour, alright?... that's good (25 g)... you're doing well (80g)... yep, yep, keep going... (90 g)... (115 g)... we need more honey... well I mean flour... (150 g)... (200 g)... ... ... (300 g)... (400 g)... a bit more... (650 g)... Ooopsie that was just too much (target was 500 g)...' Anyway, that's how it goes when baking with little ones. Just don't expect too much from your kids and you'll make it. As say a French blogger I like very much: "Our kids are all perfect! We (mums) are so imperfect... so what?" But with a dose of humour and lots of patience we can make it.
Really to be honnest I sounded more like: 'NOoooooo!! not YET! Wait, WAit, WA-IT!' 'That's good, yep, yep... nah, no, gentle... gen-tle... don't leek your fingers! GENTLE!!!... Don't touch... no don't touch... do not touch!... AAAAAAAaaaaaaaaaaaaaaah!!!!'
But we did it! I am very proud of my little baker. Don't they look gorgeous? - by the way my boy looked gorgeous, too, in his apron and with his chef's hat, but I don't feel ready to commit my kids' privacy, so sorry no pics.
Now the recipe...
Monday, 23 September 2013
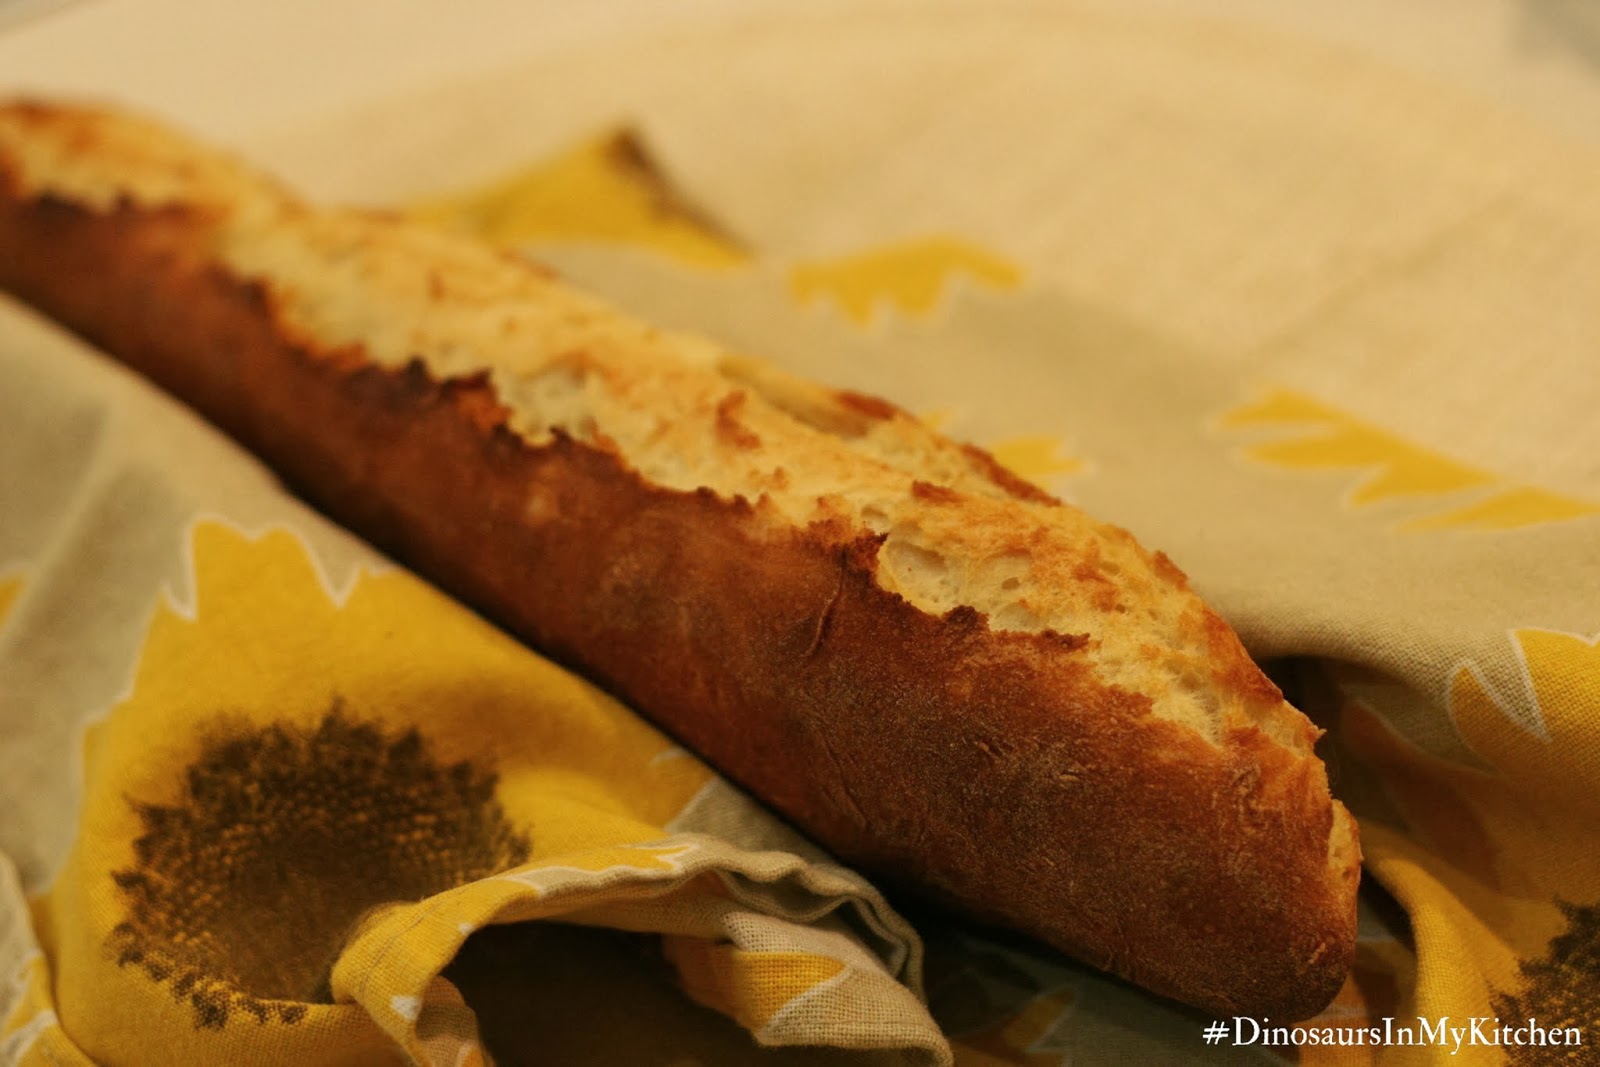
French stick / French baguette
One of the most missed French food item, not to say THE most missed, is surely the bread, in particular the baguette, or French stick as you may better know it. It suits anything like cheese, meat, sauces, delifood, chocolate, butter of course!, jam or just straight from the oven!
The crust is golden and crispy, the breadcrumb is fluffy and moist... huuuummm (French version of Yuuuuuumm)...
Making French baguette/stick is really easy, but you need to know the rules. Yes it's just a matter of following all the gestures and manipulations explained in the recipe and some very basic knowledge about bread making. I hope that after this post, you'll feel confident that you can go ahead with making French baguette. I'm giving you all the tips I know to make a good baguette. Do not compromise and follow them carefully. Bread making is almost scientific, so if you follow the recipe, there is no way you can't mess it up! Success guaranteed at first go! (or reimbursed? LOL)
I used my Kenwood FP980 with the dough tool, but I used to make my baguette by hand before, so don't be afraid if you don't have a fancy kitchen aid.
The crust is golden and crispy, the breadcrumb is fluffy and moist... huuuummm (French version of Yuuuuuumm)...
Making French baguette/stick is really easy, but you need to know the rules. Yes it's just a matter of following all the gestures and manipulations explained in the recipe and some very basic knowledge about bread making. I hope that after this post, you'll feel confident that you can go ahead with making French baguette. I'm giving you all the tips I know to make a good baguette. Do not compromise and follow them carefully. Bread making is almost scientific, so if you follow the recipe, there is no way you can't mess it up! Success guaranteed at first go! (or reimbursed? LOL)
I used my Kenwood FP980 with the dough tool, but I used to make my baguette by hand before, so don't be afraid if you don't have a fancy kitchen aid.
Sunday, 15 September 2013
Goat cheese, bacon and Rata honey tartines with dried figues
You'll love this classic French and simple dinner. You just need some bread, bacon, and goat cheese. Any real French has goat cheese in his fridge! Then to make those goat cheese tartines look and taste more fancy, just add a little bit of honey - I used Rata Honey kindly offered by Airborne for me to experiment NZ honey -, thyme and dried figues. Serve with green salad with Rata honey dressing and don't forget a glass of Pinot Gris or Chardonnay.
Airborne Rata Honey suited these tartines to perfection: creamy, buttery and slightly salty, it brought a nice balance to the saltiness of the bacon and to the tang of the goat cheese. This honey revealed its whole potential in the dressing while it brings sweetness and softeness in to the sharpness of the mustard and vinegar mix. Nice!
Quick, easy and a touch of fancy - ideal for busy moms and for busy host!
In France, we often prepare such tartines for quick dinners or as a gourmet entry when hosting friends. One may like replacing the goat cheese with blue cheese or cream cheese and sprinkle with some nuts, but my preference goes to the goat cheese.
There are not limits to your creativity to make gourmet tartines! What would be your favourite topping?
- 125 g of soft goat cheese (more or less to meet your greediness!)
- 3 slices of bacon, stripped
- 2 tbsp of honey, slightly heated (15-20 secs in the microwave)
- thyme
- 6 dried figues
Dressing:
- 1 tsp French mustard (generous)
- 1 tsp sunflower oil
- 1 tsp red wine vinegar
- 2 tsp white wine vinegar
- 1 tsp Rata honey
- 2 tsp warm water
2. Toast the bread under the grill until slightly coloured - takes approx. 4 mins each side.
3. Take the bread out of the oven and crumble the cheese over and sprinkle the bacon strips. Drizzle the heated honey and sprinkle fresh thyme over the cheese..
4. Bake under the grill for 6-7 mins - but check the colouration.
5. Prepare the dressing: brisk together the mustard and the oil until smooth and well combined. Then gradually mix in the vinegar, the honey and the water. It's ready!
6. Serve the tartines on the top of greens and drizzle a little bit more honey.
7. Don't forget the figues! I forgot them on the pictures, but they definitively add a plus to the dish
Bon appétit!
Airborne Rata Honey suited these tartines to perfection: creamy, buttery and slightly salty, it brought a nice balance to the saltiness of the bacon and to the tang of the goat cheese. This honey revealed its whole potential in the dressing while it brings sweetness and softeness in to the sharpness of the mustard and vinegar mix. Nice!
Quick, easy and a touch of fancy - ideal for busy moms and for busy host!
In France, we often prepare such tartines for quick dinners or as a gourmet entry when hosting friends. One may like replacing the goat cheese with blue cheese or cream cheese and sprinkle with some nuts, but my preference goes to the goat cheese.
There are not limits to your creativity to make gourmet tartines! What would be your favourite topping?
Ingredients (3 servings - 2 tartines/serve)
- 6 thick slices of bread*- 125 g of soft goat cheese (more or less to meet your greediness!)
- 3 slices of bacon, stripped
- 2 tbsp of honey, slightly heated (15-20 secs in the microwave)
- thyme
- 6 dried figues
Dressing:
- 1 tsp French mustard (generous)
- 1 tsp sunflower oil
- 1 tsp red wine vinegar
- 2 tsp white wine vinegar
- 1 tsp Rata honey
- 2 tsp warm water
Preparation (~ 20 mins)
1. Pre-heat the over, grill function, at 210C.2. Toast the bread under the grill until slightly coloured - takes approx. 4 mins each side.
3. Take the bread out of the oven and crumble the cheese over and sprinkle the bacon strips. Drizzle the heated honey and sprinkle fresh thyme over the cheese..
4. Bake under the grill for 6-7 mins - but check the colouration.
5. Prepare the dressing: brisk together the mustard and the oil until smooth and well combined. Then gradually mix in the vinegar, the honey and the water. It's ready!
6. Serve the tartines on the top of greens and drizzle a little bit more honey.
7. Don't forget the figues! I forgot them on the pictures, but they definitively add a plus to the dish
Bon appétit!
Good to know...
* Here I used home-made cereal bread, but any rustic-ish bread would suit.
Libellés :
Bread
,
Cheese
,
Express meals
,
French
,
Goat cheese
,
Savoury
,
Sweet & Savoury
,
Tartines
Monday, 26 August 2013
Lamb confit in olive oil and lime jus - Delightful!
The dinosaurs have been quite discrete in my kitchen lately. Don't you worry! They are still around. We even have got a baby dinosaur. It's a T-Rex, but he doesn't bite. He is scared by humans because he is a baby. Dixit my 4 years-old.
Few days ago, while I had to work from home while looking after my sick baby, my big boy commissioned me to take care of his baby dinosaur, who was also sick. It's was really cute to see my big boy talking and comforting to 'his baby dinosaur' as a parent would do. 'Don't worry my baby. Ma maman will look after you while I'm away at daycare. Don't cry. I'll come back later.'
And to me: 'Maman, please put him under the blanket and don't leave him alone. He is little and unwell. Don't be scared. He won't bite.'
What a relief! As long as he won't bite, I'll take care of him... That day promised to be quite busy, perfect for a 7-hours lamb leg confit!
I've already told you about the recipe I'm sharing today. You, busy working mums, busy mums at home, busy daddies, you greedy meat-lovers, working girls, business man, well you who is looking for a stunning dinner to full-fill your family or your hungry man, to impress your friends... with a minimum effort for a maximum effect, there you go: the 7-hours lamb leg confit or lamb leg a la cuillere.
I hear you thinking: "7-hours?! She's completely out of her mind!!!... I'm too busy, can't afford the time..." COME BACK! - I said: come back! Pleeeaaase! You won't regret it.
The roast will cook for seven hours, but it will take at most 15 minutes off your time. Trust me! You can either go out for shopping or work (using the stop cooking function of your oven), spend your day playing/looking after the kids, gardening, doing cross-words or maybe doing some Lebanese bread to compliment your lamb leg confit... while the lamb leg is slowly cooking for you...
Just try it, you'll love it!
With this lamb confit recipe, you'll get a moist and tender meat falling off the bone with a beautiful olive oil and lime jus to baste the meat and the veggies. The meat will be so moist and tender that you can spoon it! Hence the French name 'a la cuillere'. De-Light-Ful!
Few days ago, while I had to work from home while looking after my sick baby, my big boy commissioned me to take care of his baby dinosaur, who was also sick. It's was really cute to see my big boy talking and comforting to 'his baby dinosaur' as a parent would do. 'Don't worry my baby. Ma maman will look after you while I'm away at daycare. Don't cry. I'll come back later.'
And to me: 'Maman, please put him under the blanket and don't leave him alone. He is little and unwell. Don't be scared. He won't bite.'
What a relief! As long as he won't bite, I'll take care of him... That day promised to be quite busy, perfect for a 7-hours lamb leg confit!
I've already told you about the recipe I'm sharing today. You, busy working mums, busy mums at home, busy daddies, you greedy meat-lovers, working girls, business man, well you who is looking for a stunning dinner to full-fill your family or your hungry man, to impress your friends... with a minimum effort for a maximum effect, there you go: the 7-hours lamb leg confit or lamb leg a la cuillere.
I hear you thinking: "7-hours?! She's completely out of her mind!!!... I'm too busy, can't afford the time..." COME BACK! - I said: come back! Pleeeaaase! You won't regret it.
The roast will cook for seven hours, but it will take at most 15 minutes off your time. Trust me! You can either go out for shopping or work (using the stop cooking function of your oven), spend your day playing/looking after the kids, gardening, doing cross-words or maybe doing some Lebanese bread to compliment your lamb leg confit... while the lamb leg is slowly cooking for you...
Just try it, you'll love it!
With this lamb confit recipe, you'll get a moist and tender meat falling off the bone with a beautiful olive oil and lime jus to baste the meat and the veggies. The meat will be so moist and tender that you can spoon it! Hence the French name 'a la cuillere'. De-Light-Ful!
Libellés :
Easy
,
French
,
Gluten-free
,
Lamb
,
Savoury
,
Slow-cooked
Friday, 23 August 2013
Hazelnut moon crescents / Croissants de Lune Sablés
With this unstable weather, I suggest to step back into your kitchen to make these lovely, crumbly hazelnut sablés. These hazelnut moon crescent are the home-made version of a famous French biscuit brand (Les croissants de Lune de Bahlsen).
I have my very own way to eat them since I was a child: one moon segment at a time! I love them on their own or a cup of tea, but they would probably be fantastic served with a cup of coffee (If I'd like coffee!).
As per the original recipe, I shape them as little crescents. The dough is so easy to work that you can let your kids express their own creativity. My 4 years-old made caterpillar and mushrooms, unfortunately they've been eaten before I could make any pictures, so there you can see them before baking. Dinosaurs are back!
I have my very own way to eat them since I was a child: one moon segment at a time! I love them on their own or a cup of tea, but they would probably be fantastic served with a cup of coffee (If I'd like coffee!).
As per the original recipe, I shape them as little crescents. The dough is so easy to work that you can let your kids express their own creativity. My 4 years-old made caterpillar and mushrooms, unfortunately they've been eaten before I could make any pictures, so there you can see them before baking. Dinosaurs are back!
Sunday, 18 August 2013
Home-made praline / praliné
I'm preparing some special hazelnut sablé biscuits for my son's daycare snacks. Those French biscuits needs some flavoursome praliné paste, which probably can't be bought from NZ supermarkets or groceries. The good news is that it is super easy to make your own praline and once you have tasted this delicious topping or paste, I bet you'll become addict straight away!
But what's praline or praliné? It's a combination of hazelnuts and/or almonds, but could also contain pistachio or cashew. The nuts are roasted, then cooked in a slightly dark toffee and pulverised finely. After few seconds in the mill or blender, you'll obtain a powder - the praline -, if you keep grounding, then you'll obtain a paste - the praliné -.
The praline is a gourmet topping for ice-cream or custard, crumble and apple pies, and I bet it would be lovely on the top of a pavlova... I'm just saying...
The praliné paste is delicious spread on toasts, combined in crème chantilly for choux filling, or combined in cake, brioches, cookies and biscuits.
The recipe I'm sharing today comes from a world-renowned French pastry chef: Philippe Conticini, so it is a high standard recipe, but you'll be stroke how easy it is. You just need a good food processor and a little bit of patience.
But what's praline or praliné? It's a combination of hazelnuts and/or almonds, but could also contain pistachio or cashew. The nuts are roasted, then cooked in a slightly dark toffee and pulverised finely. After few seconds in the mill or blender, you'll obtain a powder - the praline -, if you keep grounding, then you'll obtain a paste - the praliné -.
The praline is a gourmet topping for ice-cream or custard, crumble and apple pies, and I bet it would be lovely on the top of a pavlova... I'm just saying...
The praliné paste is delicious spread on toasts, combined in crème chantilly for choux filling, or combined in cake, brioches, cookies and biscuits.
Libellés :
Biscuits
,
Dessert
,
French
,
French grocery
,
Gluten-free
,
Praline
,
Pudding
,
Sweet
Wednesday, 14 August 2013
My gourmet mango crumble
I won't hold the suspense any longer. Here is the recipe of my gourmet mango crumble!
For this absolute pleasure, you'll need butter cookies or shortbread cookies (see recipe here), vanilla ice-cream (see recipe here), salted caramel sauce (see recipe below) and of course fresh mangoes!
If you don't have the time to make all these elements yourself, you can easily use shortened biscuits, ice-cream and caramel sauce from the supermarket, but let's be frank: it will be much nicer home-made, and you can prepare all the elements in advance so that you just need to prepare the roasted mangoes before you serve. Don't be afraid by these elements; they are all super-easy to make!
- 1 knob of natural butter
- 1 tsp raw sugar
- 6 butter cookies or shortbread cookies - see recipe here
- 1 or 2 scoops of vanilla ice-cream per serving - see recipe here
- a generous dash of salted caramel sauce - see recipe at the end of this post
For this absolute pleasure, you'll need butter cookies or shortbread cookies (see recipe here), vanilla ice-cream (see recipe here), salted caramel sauce (see recipe below) and of course fresh mangoes!
If you don't have the time to make all these elements yourself, you can easily use shortened biscuits, ice-cream and caramel sauce from the supermarket, but let's be frank: it will be much nicer home-made, and you can prepare all the elements in advance so that you just need to prepare the roasted mangoes before you serve. Don't be afraid by these elements; they are all super-easy to make!
Mango crumble (6 servings)
Ingredients
- 2 fresh mangoes, diced into very small pieces- 1 knob of natural butter
- 1 tsp raw sugar
- 6 butter cookies or shortbread cookies - see recipe here
- 1 or 2 scoops of vanilla ice-cream per serving - see recipe here
- a generous dash of salted caramel sauce - see recipe at the end of this post
Tuesday, 13 August 2013
Vanilla ice-cream
Tuesday... only... And I wish we would already be Friday! Today was exhausting, taking the bus to the City with bubba in the sling... several meetings and finishing work near to 5 pm! Thanks man, you found something to re-heat for dinner tonight! It's just a shame men can't think forward, in particular of the next day and the lunch boxes of our little ones. So I ended up cooking something after dinner for my boys' lunches tomorrow. The good stuff is that everything is ready for tomorrow night! Yay!!!
Although my bed is insistently calling for me, I promised to share with you the recipes of my cooking week-end. Today, I continue with the dessert... remember my version of a mango crumble... - Yuuuummm, just thinking of it, I want a serve now! - requires vanilla ice-cream... yum yum! Unfortunately there is no more left, already! :/
Sorry I have no picture of the ice-cream on its own and I do not want to reveal my Mango crumble yet, be patient...
- 500 ml milk*
- 250 ml cream
- 130 g caster sugar
- 5 yolks
- 1 tbsp natural vanilla extract
1. Pour the milk and the cream in a pot, add the vanilla and heat until it starts boiling. Get the pot straight out of the heat when you see the first bubbling.
2. In the meantime, whisk together the sugar and the yolks until they whiten and double in volume.
3. When the milk and cream mix is hot, gradually mix into the sugar and yolk preparation with a wooden spoon.*
4. Pour back into the pot and put on gentle heat, while stirring gently until the custard coats the spoon.
5. Let cool down in the fridge. The custard will slightly thicken in the fridge.
6. When your custard is cold, the coldest possible, pour it in the ice-cream maker and churn for about 25-30 mins.* No worries if it is still a bit runny, the ice-cream will set in the freezer. Serve after an hour or more, but I definitively recommend to serve it the same day!
* The secret to a successful custard is to not whisk briskly otherwise you may split the cream. Do not use a whisk. If the cream splits, no worries, there is a trick to save your custard: when you're happy with the consistence (after step 4), then mix it in a blender and rest.
* The churning time depends on the temperature of your custard as well as of the iced bowl. So feel free to adapt this timing to your particular context.
Although my bed is insistently calling for me, I promised to share with you the recipes of my cooking week-end. Today, I continue with the dessert... remember my version of a mango crumble... - Yuuuummm, just thinking of it, I want a serve now! - requires vanilla ice-cream... yum yum! Unfortunately there is no more left, already! :/
Sorry I have no picture of the ice-cream on its own and I do not want to reveal my Mango crumble yet, be patient...
Ingredients (~15 scoops)
- 250 ml cream
- 130 g caster sugar
- 5 yolks
- 1 tbsp natural vanilla extract
Preparation
This ice-cream is based on a classic vanilla custard, which I recommend to make the day before to leave it the time to cool down and set before putting in the ice-cream maker.1. Pour the milk and the cream in a pot, add the vanilla and heat until it starts boiling. Get the pot straight out of the heat when you see the first bubbling.
2. In the meantime, whisk together the sugar and the yolks until they whiten and double in volume.
3. When the milk and cream mix is hot, gradually mix into the sugar and yolk preparation with a wooden spoon.*
4. Pour back into the pot and put on gentle heat, while stirring gently until the custard coats the spoon.
5. Let cool down in the fridge. The custard will slightly thicken in the fridge.
6. When your custard is cold, the coldest possible, pour it in the ice-cream maker and churn for about 25-30 mins.* No worries if it is still a bit runny, the ice-cream will set in the freezer. Serve after an hour or more, but I definitively recommend to serve it the same day!
Tips
* I used trimmed milk for a healthier option but it works with light or full-fat milk, too.* The secret to a successful custard is to not whisk briskly otherwise you may split the cream. Do not use a whisk. If the cream splits, no worries, there is a trick to save your custard: when you're happy with the consistence (after step 4), then mix it in a blender and rest.
* The churning time depends on the temperature of your custard as well as of the iced bowl. So feel free to adapt this timing to your particular context.
Friday, 2 August 2013
Chocolate cake and coconut chantilly
Last week-end, we invited our neighbours at home for a pudding. It took only 2 sec to the little girls to notice the chocolate cake sitting on the kitchen bench. I bet they could smell the chocolate from their place, so the cake was rich in chocolate. But because it's never enough for dinodad, I decided to glaze it with a chocolate ganache. And because, dinomum is only a chocoholic beginner... What??! How?... Yes I need to tell you that story.
I never really enjoyed chocolate, never ever. As a child, I would have never taken a chocolate ice cream, vanilla or strawberry instead! I had Easter or Christmas chocolates in horror for the greatest pleasure of my dad and brothers. I much preferred candy and nougat. I would make chocolate cakes only to please the ones I loved. I couldn't understand my partner's addiction for this bitter and quite hardcore treat. I was quite proud of this reluctance to chocolate; it made me feel different than the mass of all those chocolate fans. And last year, when I got introduced to chocolate Fridays at work, I even prided myself that they would be happy to know that I'd leave them my portion as I would never feel like chocolate. No one could believe me.
But short after this, I got pregnant and everything changed (again)! I started to join in chocolate Fridays. I started buying chocolate tabs (for the big enjoyment of dinodad of course!), one per week, then two... or more... I developed an embarrassing chocolate addiction. When dinodad implied that I behaved the same way toward chocolate during my first pregnancy, I couldn't believe. So I kept confident that straight after delivery, this chocolate thing would vanish!
Bubba just turned 9 months-old and I am still fighting the chocolate appeal. My last hope is in weaning my little one off the breast... To be followed later this year... Hopefully this works before I got completely crazy about chocolate!
Well, as I was saying a bit earlier... (after the chocolate cake and the chocolate ganache...) 'And because, dinomum is only a chocoholic beginner', I decided to serve the chocolate cake with a light coconut chantilly to balance a little bit the bitterness and heaviness of the chocolate.
We all enjoyed this pudding very much, although the kids were more keen on the cake than the chantilly cream, but mummy was happy! :)
I never really enjoyed chocolate, never ever. As a child, I would have never taken a chocolate ice cream, vanilla or strawberry instead! I had Easter or Christmas chocolates in horror for the greatest pleasure of my dad and brothers. I much preferred candy and nougat. I would make chocolate cakes only to please the ones I loved. I couldn't understand my partner's addiction for this bitter and quite hardcore treat. I was quite proud of this reluctance to chocolate; it made me feel different than the mass of all those chocolate fans. And last year, when I got introduced to chocolate Fridays at work, I even prided myself that they would be happy to know that I'd leave them my portion as I would never feel like chocolate. No one could believe me.
But short after this, I got pregnant and everything changed (again)! I started to join in chocolate Fridays. I started buying chocolate tabs (for the big enjoyment of dinodad of course!), one per week, then two... or more... I developed an embarrassing chocolate addiction. When dinodad implied that I behaved the same way toward chocolate during my first pregnancy, I couldn't believe. So I kept confident that straight after delivery, this chocolate thing would vanish!
Bubba just turned 9 months-old and I am still fighting the chocolate appeal. My last hope is in weaning my little one off the breast... To be followed later this year... Hopefully this works before I got completely crazy about chocolate!
Well, as I was saying a bit earlier... (after the chocolate cake and the chocolate ganache...) 'And because, dinomum is only a chocoholic beginner', I decided to serve the chocolate cake with a light coconut chantilly to balance a little bit the bitterness and heaviness of the chocolate.
We all enjoyed this pudding very much, although the kids were more keen on the cake than the chantilly cream, but mummy was happy! :)
Thursday, 1 August 2013
Braised pork tenderloin with butternut squash and fried polenta
Sunday, I left baby and partner home and I took my 4 years-old to the movies. The movie was very good for little ones, a lovely story about friendship between a bear and a mouse: Ernest & Celestine. After only few minutes, I felt blessed - and a little bit stupid to feel a bit emotional while watching a kid movie with my son - probably the lack-of-rest effect.
I felt so blessed to live in New Zealand, to be allowed to raise my children in this amazing country, to raise them as bilinguals and to share my native language and culture with my growing kiwis. What does it have to do with the movie? The movie was in French! When I left France, I gave up the idea of going to see a French movie with my children. But that was due to my ignorance of New Zealand way of integrating cultures. Not only New Zealand offers an amazing lifestyle, it also accepts and encourage the diversity of cultures. I couldn't tell for other cultures, but as French living in Auckland, we are blessed with a very active community that allows parents like us to pass our culture on our children thanks to playgroups (I love the kiwi culture of playgroups/playcentre, it's just a shame I have limited access to it because I work full-time), the preschools, the bilingual sections in primary schools and the various socialising French events and other festivals. Beyond the language, of course, food is another way to pass on our culture, and not only to our children.
After the movie, I felt even more blessed when I came back home where a meal from an original recipe by my mum had perfumed the entire the house after 2 hours of slow cooking earlier the same day: a braised pork tenderloin with a rustic-tasting but elegant sauce made from onions, carrots, tomatoes and mushrooms. This dish was well-known of all the kids from the neighbourhood in my home-town; this for the holy good reason that it is deliciously rich of flavour, while balanced and not overly fat.
I felt so blessed to live in New Zealand, to be allowed to raise my children in this amazing country, to raise them as bilinguals and to share my native language and culture with my growing kiwis. What does it have to do with the movie? The movie was in French! When I left France, I gave up the idea of going to see a French movie with my children. But that was due to my ignorance of New Zealand way of integrating cultures. Not only New Zealand offers an amazing lifestyle, it also accepts and encourage the diversity of cultures. I couldn't tell for other cultures, but as French living in Auckland, we are blessed with a very active community that allows parents like us to pass our culture on our children thanks to playgroups (I love the kiwi culture of playgroups/playcentre, it's just a shame I have limited access to it because I work full-time), the preschools, the bilingual sections in primary schools and the various socialising French events and other festivals. Beyond the language, of course, food is another way to pass on our culture, and not only to our children.
After the movie, I felt even more blessed when I came back home where a meal from an original recipe by my mum had perfumed the entire the house after 2 hours of slow cooking earlier the same day: a braised pork tenderloin with a rustic-tasting but elegant sauce made from onions, carrots, tomatoes and mushrooms. This dish was well-known of all the kids from the neighbourhood in my home-town; this for the holy good reason that it is deliciously rich of flavour, while balanced and not overly fat.
Libellés :
Childhood
,
French
,
Gluten-free
,
Healthy food
,
Mum-style
,
Pork
,
Savoury
,
Slow-cooked
Friday, 26 July 2013
Leek and onion tart with blue cheese
Yesterday, I posted a recipe to use unused egg whites. This post brought a very smart question: "What do you do with the yolks?"
The answer to this question is multiple and I will dedicate a post to recipes that will use only yolks or only egg whites, as long as I feed this blog.
In my case, the question could have been "What did you do with the yolks?"
This question was an easy one: I made a leek and onion tart.
A tart - not a quiche - this tart was inspired by the classic French onion tart with a twist: leeks and blue cheese.* By contrast with the quiche, this tart filling is creamy and delicate. It can be served as a light dinner or as an appetizer with a glass of Pinot Gris.
- 70g butter, diced, at room tempreature
- 50ml water
- a pinch of salt
For the busiest cook, just use an industrial savoury pastry - you'll save about 10 mins.
The answer to this question is multiple and I will dedicate a post to recipes that will use only yolks or only egg whites, as long as I feed this blog.
In my case, the question could have been "What did you do with the yolks?"
This question was an easy one: I made a leek and onion tart.
A tart - not a quiche - this tart was inspired by the classic French onion tart with a twist: leeks and blue cheese.* By contrast with the quiche, this tart filling is creamy and delicate. It can be served as a light dinner or as an appetizer with a glass of Pinot Gris.
Ingredients (8 servings)
For the pastry:
- 160g flour- 70g butter, diced, at room tempreature
- 50ml water
- a pinch of salt
For the busiest cook, just use an industrial savoury pastry - you'll save about 10 mins.
Thursday, 25 July 2013
Lemon and blueberry Financier cake
I was so excited to be off work, on annual leaves today. Figure of speech?
My day began around 5.50am, just as usual, with the first food request of the day - No.2's breastfeed! But lucky we both fell back to sleep until 7.30am! Yay! Until I can vaguely hear "Maman, I'm hungry" from somewhere like on another planet... No.1 is awake. The day can start.
9am: direction to the doctor to get - I took the 'working mom special plan': every day off, I have the pleasure to see our doctor for one of my two boys when it's not myself!
Followed by the pharmacy, the bank, the post and the mall.
11 am: the kid show started in the mall (cause holidays). No.1 was so happy to watch it I couldn't refuse. Time for No.2 second breastfeed of the day... I really enjoyed sitting on the floor in the centre of the mall, with a baby breastfeeding and a big boy watching the magician with little stars in the eyes, in spite of what he made several requests for all sorts of naughty food.
12 pm: we're all home and starving! Of course, it's lunch time already! Fortunately I had some delish leftover of Paella (still need to find the time to post you the recipe as this dish was just stunning!)
1.30pm: No.2 Plunket appointment. I think that at that time I did not get a chance go wee-wee. Don't laugh at me I'm sure you already experience that!
2 pm: Back to the mall to change a faulty item bought the same morning.
3 pm: we are finally back home! for good! Just on time for a little dino snack, but nothing is ready yet.
I looked in the fridge and find a bowl with egg whites left from the day before that I needed to use. Perfect to test this appealing recipe with egg whites only: Financiers myrtilles/citron created by Camille from Cakes in the city. Despite the English name, this is a French blog. But don't worry - I have tested and translated this easy and quick recipe for you ;-)
Libellés :
Cake
,
French
,
Pudding
,
Sweet
,
White eggs
Saturday, 20 July 2013
Stand up ovation! Caramel custard / Home-made Danette
There are many food products that we miss from France when we live here in New Zealand.
Remember, two days ago, I opened a can of evaporated milk for the first time of my life. And when I tasted it, it reminded me one of those missed French pudding: the famous Danette - and now all my French followers are singing 'On se lève tous pour Daaanette, Daaanette!...", from the famous TV ad where everybody stand up for this pudding, creating a stand up ovation for this humble custard.
After more than two years in NZ and one can of evaporated milk opened, I finally decided to give it a go and experiment my home-made Danette. I still wonder why I did not try earlier.
It is actually very easy, easier than I'd thought, and very quick to make. Today, I chose the caramel flavour and it was delightful! And it is gluten-free!!! I may go for another serve right now...
Remember, two days ago, I opened a can of evaporated milk for the first time of my life. And when I tasted it, it reminded me one of those missed French pudding: the famous Danette - and now all my French followers are singing 'On se lève tous pour Daaanette, Daaanette!...", from the famous TV ad where everybody stand up for this pudding, creating a stand up ovation for this humble custard.
After more than two years in NZ and one can of evaporated milk opened, I finally decided to give it a go and experiment my home-made Danette. I still wonder why I did not try earlier.
It is actually very easy, easier than I'd thought, and very quick to make. Today, I chose the caramel flavour and it was delightful! And it is gluten-free!!! I may go for another serve right now...
Ingredients (5 servings)
Caramel:
- 150g white sugar
- 1/2 tsp lemon juice
- 5 tbp evaporated milk
Libellés :
Dessert
,
French
,
Gluten-free
,
Pudding
,
Sweet
Tuesday, 16 July 2013
Celebrating Bastille Day with Crêpes
A promise is a promise: I made galettes (click for the recipe) and crêpes for all my workmates in the honour of Bastille Day - well the 2 days delay doesn't count; only the intention counts!
Dear workmates! if you're coming over here, please leave a comment to share your galette and crêpe tasting experience ;) And if you don't, never mind! we can all see there was only this left out of near 5 litters of batter! (see pic below).
For sweet crêpes, I am quite a classic girl: I like it filled with a little bit a sugar; it gives it a bit of crunch! But today I had one with raspberry jam, which is my second favourite. And you, what's yours?
Subscribe to:
Posts
(
Atom
)